Quick Start
In this example, we use OpenAI GPT-4o to search headphones on eBay, and then get the result items and prices in JSON format.
Remember to prepare an API key that is eligible for accessing OpenAI's GPT-4o before running.
Preparation
Config the OpenAI API key, or customize model vendor
# replace by your own
export OPENAI_API_KEY="sk-abcdefghijklmnopqrstuvwxyz"
Experience with Command Line Tools
Command line version of Midscene is a very convenient way to experience the basics.
Ensure that you have Node.js installed.
# headless mode to visit bing.com and search for 'weather today'
npx @midscene/cli --url https://wwww.bing.com --action "type 'weather today', hit enter"

# headed mode (i.e. visible browser) to visit bing.com and search for 'weather today'
npx @midscene/cli --headed --url https://wwww.bing.com --action "type 'weather today', hit enter"

# visit github status page and save the status to ./status.json
npx @midscene/cli \
  --url https://www.githubstatus.com/ \
  --query-output status.json \
  --query '{name: string, status: string}[], service status of github page'
If you want to dive deep into Midscene, we recommend using the SDK version and integrating it with Playwright or Puppeteer.
View test report after running
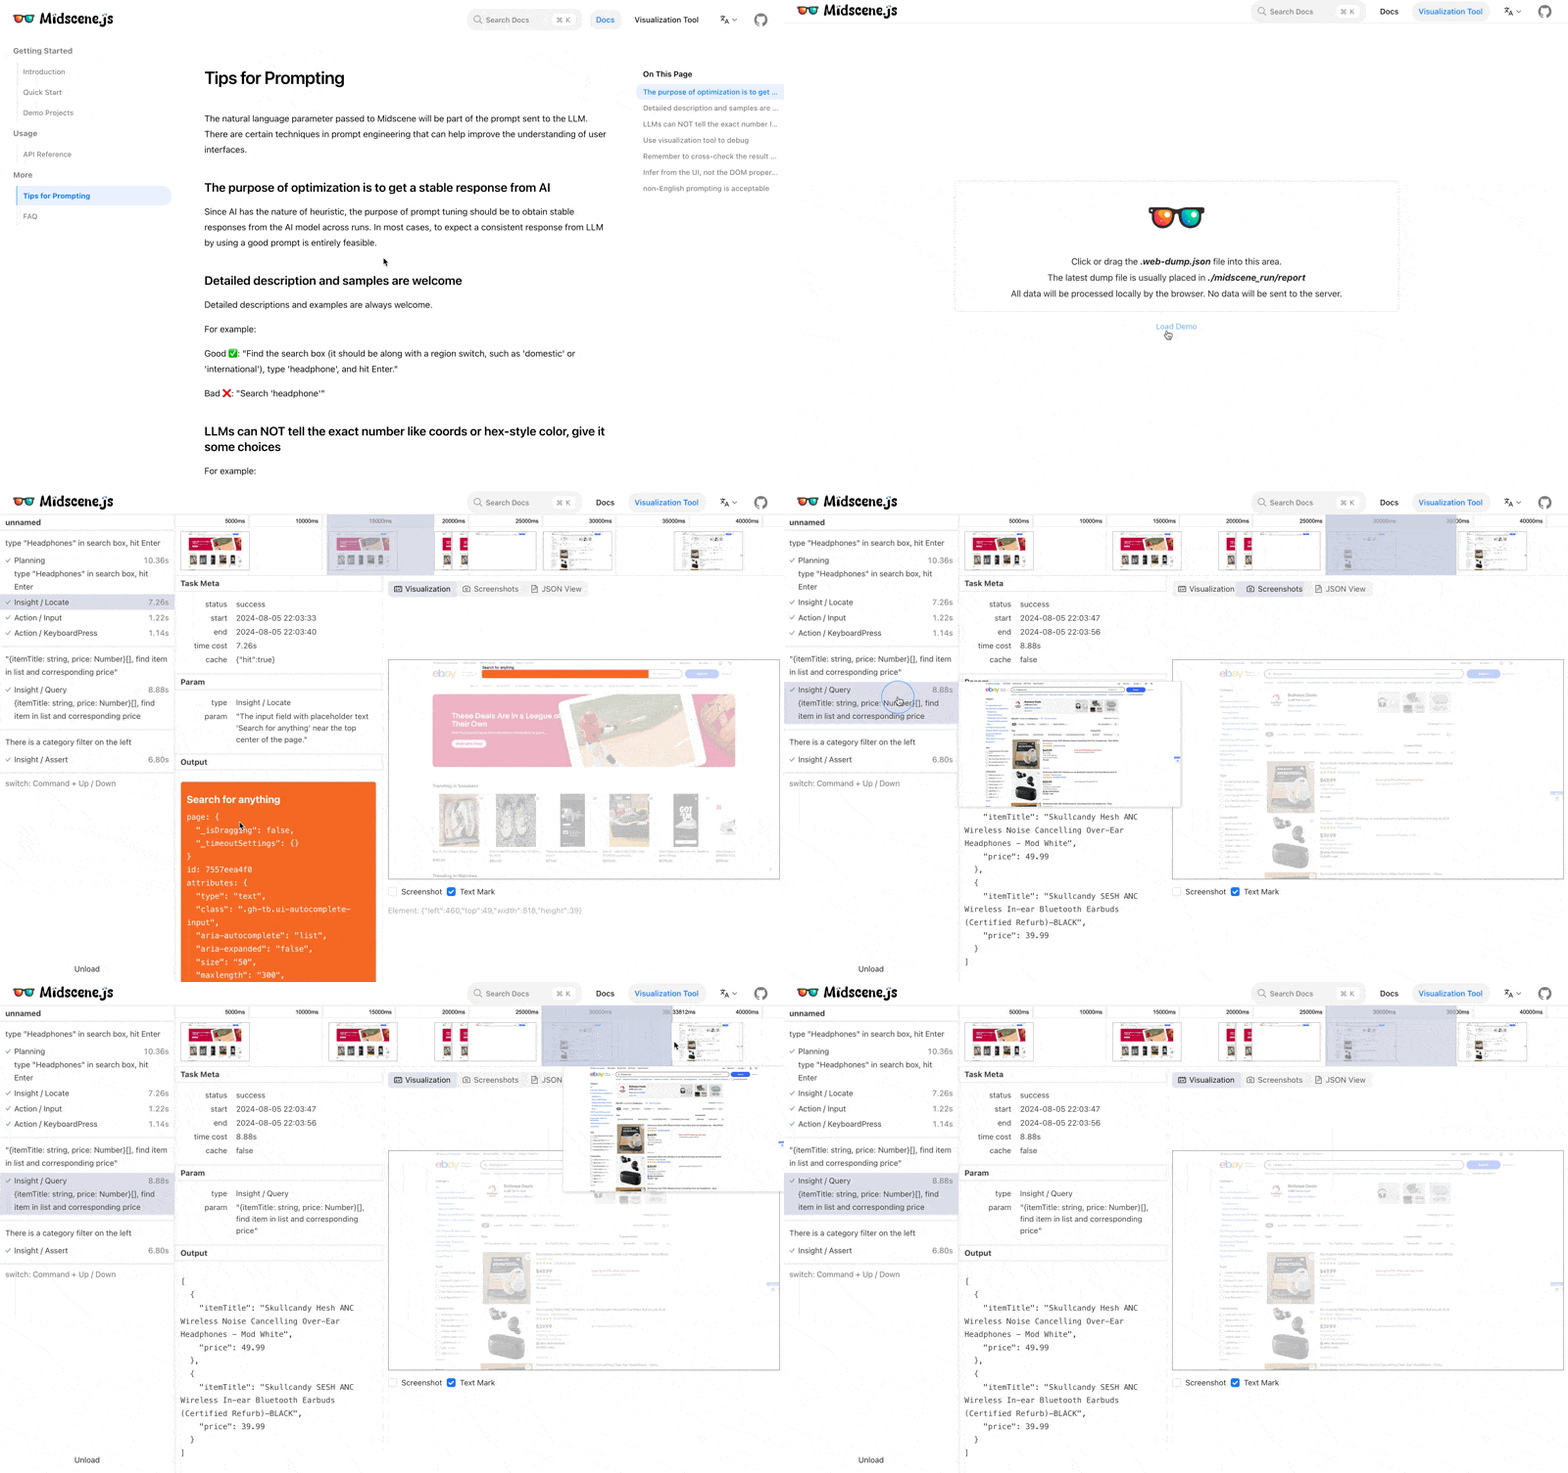
After running, Midscene will generate a log dump, which is placed in ./midscene_run/report/latest.web-dump.json by default. Then put this file into Visualization Tool, and you will have a clearer understanding of the process.
Integrate with Playwright
Playwright.js is an open-source automation library developed by Microsoft, primarily designed for end-to-end testing and web scraping of web applications.
We assume you already have a project with Puppeteer.
add the dependency
npm install @midscene/web --save-dev
Step 1. update playwright.config.ts
export default defineConfig({
  testDir: './e2e',
+ timeout: 90 * 1000,
+ reporter: [["list"], ["@midscene/web/playwright-report"]],
});
Step 2. extend the test instance
Save the following code as ./fixture.ts;
import { test as base } from '@playwright/test';
import type { PlayWrightAiFixtureType } from '@midscene/web';
import { PlaywrightAiFixture } from '@midscene/web';

export const test = base.extend<PlayWrightAiFixtureType>(PlaywrightAiFixture());
Step 3. write the test case
Save the following code as ./e2e/ebay-search.spec.ts
./e2e/ebay-search.spec.ts
import { expect } from "@playwright/test";
import { test } from "./fixture";

test.beforeEach(async ({ page }) => {
  page.setViewportSize({ width: 1280, height: 800 });
  await page.goto("https://www.ebay.com");
  await page.waitForLoadState("networkidle");
});

test("search headphone on ebay", async ({ ai, aiQuery, aiAssert }) => {
  // 👀 type keywords, perform a search
  await ai('type "Headphones" in search box, hit Enter');

  // 👀 find the items
  const items = await aiQuery(
    "{itemTitle: string, price: Number}[], find item in list and corresponding price"
  );

  console.log("headphones in stock", items);
  expect(items?.length).toBeGreaterThan(0);

  // 👀 assert by AI
  await aiAssert("There is a category filter on the left");
});
Step 4. run the test case
npx playwright test ./e2e/ebay-search.spec.ts
Step 5. view test report after running
After the above command executes successfully, the console will output: Midscene - report file updated: ./current_cwd/midscene_run/report/some_id.html. You can open this file in a browser to view the report.
Integrate with Puppeteer
Puppeteer is a Node.js library which provides a high-level API to control Chrome or Firefox over the DevTools Protocol or WebDriver BiDi. Puppeteer runs in the headless (no visible UI) by default but can be configured to run in a visible ("headful") browser.
Step 1. install dependencies
npm install @midscene/web puppeteer ts-node --save-dev
Step 2. write scripts
Write and save the following code as ./demo.ts.
./demo.ts
import puppeteer from "puppeteer";
import { PuppeteerAgent } from "@midscene/web";

const sleep = (ms: number) => new Promise((r) => setTimeout(r, ms));
Promise.resolve(
  (async () => {
    const browser = await puppeteer.launch({
      headless: false, // here we use headed mode to help debug
    });

    const page = await browser.newPage();
    await page.setViewport({
      width: 1280,
      height: 800,
      deviceScaleFactor: 1,
    });

    await page.goto("https://www.ebay.com");
    await sleep(5000);

    // 👀 init Midscene agent
    const mid = new PuppeteerAgent(page);

    // 👀 type keywords, perform a search
    await mid.aiAction('type "Headphones" in search box, hit Enter');
    await sleep(5000);

    // 👀 understand the page content, find the items
    const items = await mid.aiQuery(
      "{itemTitle: string, price: Number}[], find item in list and corresponding price"
    );
    console.log("headphones in stock", items);

    // 👀 assert by AI
    await mid.aiAssert("There is a category filter on the left");

    await browser.close();
  })()
);
TIP
You may have noticed that the key lines of code for this only consist of three lines. They are all written in plain language.
await mid.aiAction('type "Headphones" in search box, hit Enter');
await mid.aiQuery(
  '{itemTitle: string, price: Number}[], find item in list and corresponding price',
);
await mid.aiAssert("There is a category filter on the left");
Step 3. run
Using ts-node to run, you will get the data of Headphones on eBay:
# run
npx ts-node demo.ts

# it should print
#  [
#   {
#     itemTitle: 'JBL Tour Pro 2 - True wireless Noise Cancelling earbuds with Smart Charging Case',
#     price: 551.21
#   },
#   {
#     itemTitle: 'Soundcore Space One无线耳机40H ANC播放时间2XStronger语音还原',
#     price: 543.94
#   }
# ]
Step 4: View the Run Report
After the above command executes successfully, the console will output: Midscene - report file updated: ./current_cwd/midscene_run/report/some_id.html. You can open this file in a browser to view the report.
Alternatively, you can import the ./midscene_run/report/latest.web-dump.json file into the Visualization Tool to view it.
View demo report
Click the 'Load Demo' button in the Visualization Tool, you will be able to see the results of the previous code as well as some other samples.


